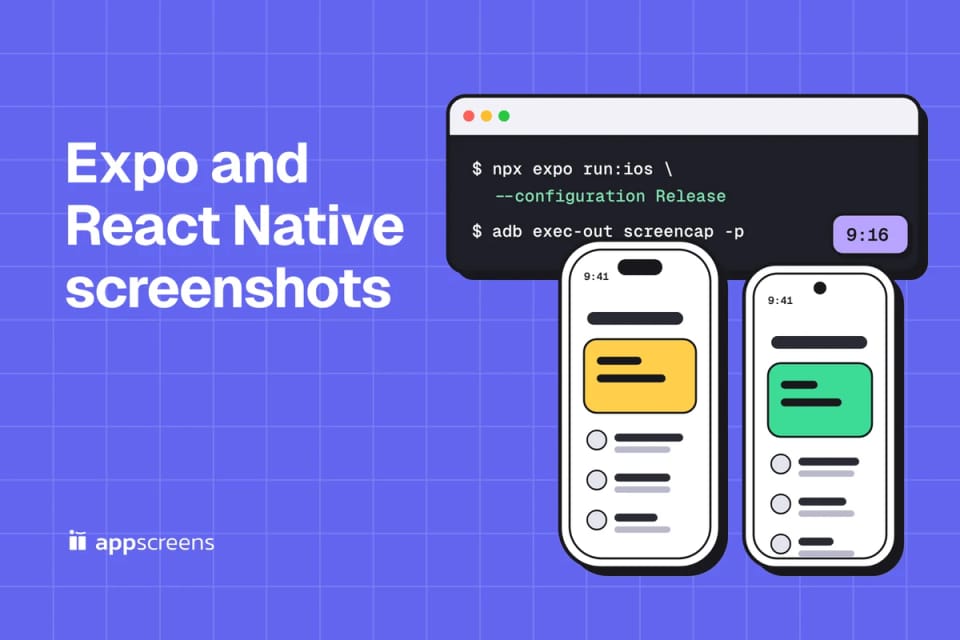
To make App Store screenshots for an Expo app, build a Release version, capture each screen on the iPhone simulator with xcrun simctl io and on an Android emulator with adb exec-out screencap, then add captions and a frame and export each store size: 1206 × 2622 for iPhone and 9:16 for Google Play. Upload them as a separate step, because eas submit sends the build, not the screenshots.
Check iPad support first, because it decides how many sets App Store Connect asks for: an Expo app supports iPad when ios.supportsTablet is true, and a new React Native CLI app supports it from the start. On Android, Google Play rejects anything taller than 2:1, so most raw captures need a 9:16 page. You can submit plain captures if they meet each store's requirements and show the app accurately, but they show the interface without selling it. With the AppScreens MCP server connected, the coding agent in your project folder writes the captions and lays out every store size.
1. Expo capture
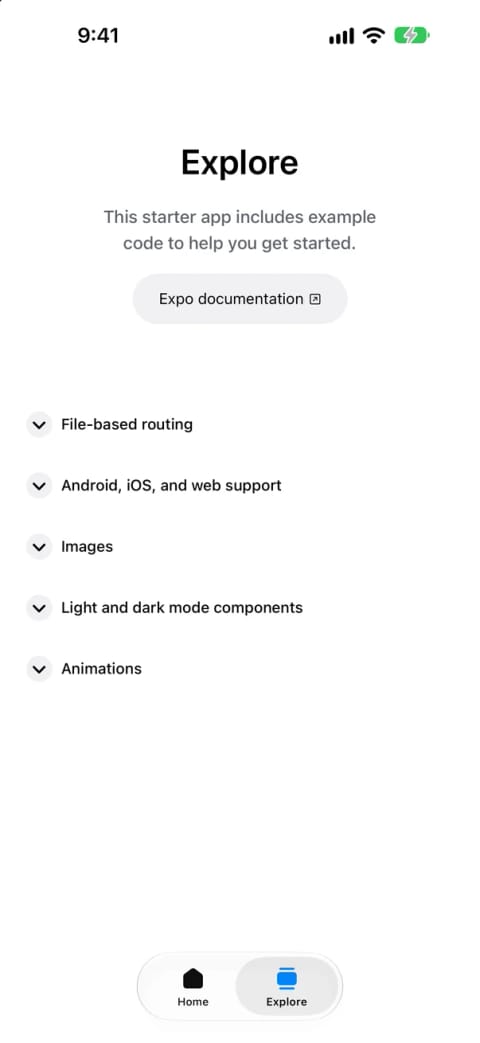
2. App Store, iPhone
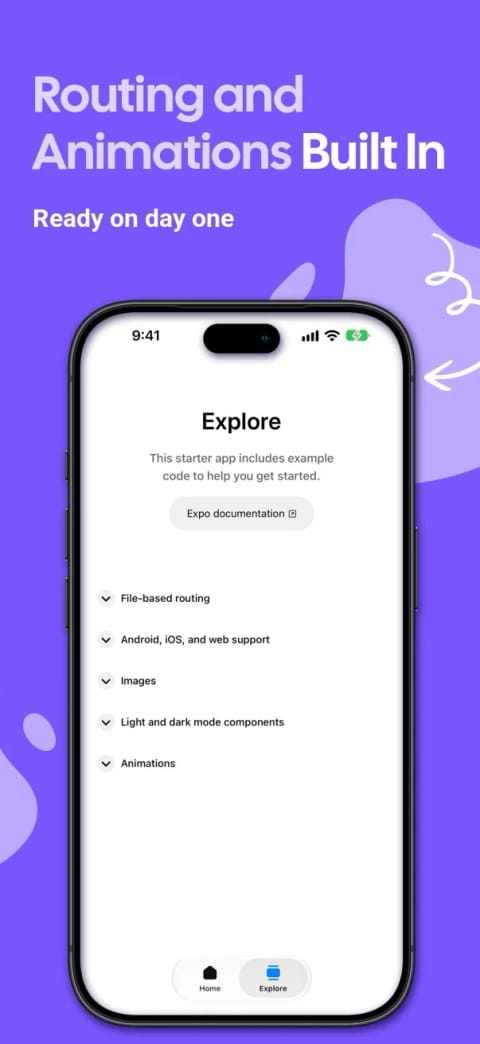
3. Google Play, 9:16
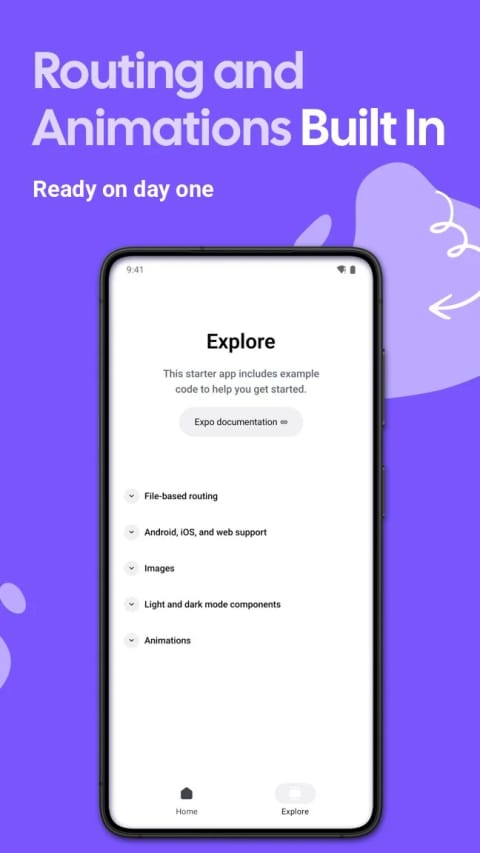

Quick Take
- Run a Release build on the iPhone simulator and an Android emulator:
npx expo run:ios --configuration Release --no-bundlerandnpx expo run:android --variant release --no-bundler. Add the 13-inch iPad ifios.supportsTabletis true. - Capture clean screens: sample data, a 9:41 status bar and one deep link per screen.
- Turn the captures into a captioned set for each store, and lead with your strongest screen, because most visitors don't scroll. With AppScreens connected, your coding agent does this from the captures.
- Check the set in a listing preview, then export 1206 × 2622 for iPhone and 9:16 for Google Play. Raw Android captures at 1080 × 2400 break Google Play's 2:1 limit, but they fit inside a frame on a 9:16 page.
- Upload the images as their own step:
eas submitsends the build, not the screenshots.
Sample data, the status bar, iPad and the 2:1 limit are covered step by step below.
What size should Expo app screenshots be?
Capture at these sizes and you won't need to resize anything later. Apple wants exact pixel sizes. Google Play accepts a range, with a ratio limit that most raw phone captures break.
| Set | Size to capture or export | How many | When it is required |
|---|---|---|---|
| iPhone | 1206 × 2622 or 1179 × 2556 portrait for the required slot, iPhone with Dynamic Island (medium display). 1320 × 2868 fills the optional large slot. | 1 to 10 | Unless the app is iPad only |
| iPad 13-inch | 2064 × 2752 or 2048 × 2732 portrait | 1 to 10 | When the app runs on iPad |
| iPhone Duo | Inner and outer display sizes | 1 to 10 | From April 2027, for apps built with the iOS 27.1 SDK or later (see below) |
| Google Play phone | Anything from 320 to 3840 px per side with the long side no more than twice the short side uploads. Google's recommendation formats ask for 9:16 with at least 1080 px on the short side, such as 1080 × 1920. | 2 to 8, and 4 or more for the recommendation formats | At least 2 across your device types |
| Google Play feature graphic | 1024 × 500. Make it with the Google Play feature graphic generator. | 1 | Always |
| Google Play app icon | 512 × 512, 32-bit PNG | 1 | Always |
Many tutorials still call the 6.9-inch 1320 × 2868 size the required one. Apple's specifications now name iPhone with Dynamic Island (medium display) instead, which the iPhone 18 Pro, 17 Pro and 17 simulators capture. Apple also says "Images can't include alpha channels or transparencies", and Google asks for no alpha too, so check every final file.
On iPhone Duo, Apple's two pages differ. The screenshot specifications require Duo screenshots from April 2027 for apps built with the iOS 27.1 SDK or later, which means Xcode 27.1 or later. Apple's October 2026 announcement words it more broadly, as every app submitted from April 2027, so check which SDK your build uses and plan for them either way. If EAS builds your app, the Xcode version is in the build log. Every accepted alternative size is on the App Store screenshot sizes and Google Play screenshot sizes pages.
1. Does your Expo or React Native app need iPad screenshots?
If the build supports iPad, App Store Connect shows an iPad section and won't let you submit until it has screenshots. Expo and the React Native CLI template have opposite defaults.
- Expo:
ios.supportsTablet"Defaults tofalse", and the default template (expo-template-default 58.0.33) doesn't set it, but the blank and tabs templates set it totrue, so check yourapp.json. Prebuild turns it into the Xcode setting: iPhone only by default, iPhone and iPad whensupportsTabletis true, iPad only withisTabletOnly. - React Native CLI: the community template (0.88.1) ships with
TARGETED_DEVICE_FAMILY = "1,2", which means iPhone and iPad. If you never designed for iPad, remove iPad under Supported Destinations in Xcode before your first release. - Replit and Bolt build mobile apps with Expo, so the Expo rule applies. Check
app.jsonorapp.config.tsin the code you downloaded.
Check an Expo project, then a project that has an ios folder. No output from the first command means the default, iPhone only:
npx expo config --type public | grep -E "supportsTablet|isTabletOnly"
grep -m1 TARGETED_DEVICE_FAMILY ios/*.xcodeproj/project.pbxproj
What prebuild wrote in our test, before and after setting supportsTablet to true, and after removing it again:
$ npx expo config --type public | grep -E "supportsTablet|isTabletOnly"
(no output: iPhone only)
$ npx expo prebuild -p ios --no-install --clean
$ grep -m1 TARGETED_DEVICE_FAMILY ios/*.xcodeproj/project.pbxproj
TARGETED_DEVICE_FAMILY = "1";

# "supportsTablet": true added under "ios" in app.json
$ npx expo prebuild -p ios --no-install --clean
$ grep -m1 TARGETED_DEVICE_FAMILY ios/*.xcodeproj/project.pbxproj
TARGETED_DEVICE_FAMILY = "1,2";

# supportsTablet removed again, ios/ kept, prebuild not run
$ grep -m1 TARGETED_DEVICE_FAMILY ios/*.xcodeproj/project.pbxproj
TARGETED_DEVICE_FAMILY = "1,2";
If your ios folder is committed and you don't run prebuild, the Xcode project wins, as the last check shows: changing app.json does nothing until you run npx expo prebuild -p ios --clean.
Decide before the first release. App Store Connect refuses an upload that drops a device family the previous version supported, so an accidental iPad app stays an iPad app.
2. Capture from a Release build
A Debug build shows things your users never see: LogBox warnings at the bottom of the screen, the developer menu that a development build opens on first launch, and slower first renders while Metro serves the bundle. A Release build has the JavaScript bundled inside, so it looks and loads like the App Store version. It runs on a simulator without your distribution certificate.
Expo, on a simulator or emulator chosen by name or UDID:
npx expo run:ios --configuration Release --no-bundler --device "$UDID"
npx expo run:android --variant release --no-bundler
--no-bundler skips Metro, which a Release build doesn't need. The command then returns once the app opens; without it, Expo starts Metro anyway and keeps streaming logs until you stop it, which also stalls a capture script.
React Native CLI, from its documentation (our test used Expo only):
npx react-native run-ios --mode Release --udid "$UDID"
npx react-native run-android --mode release
In our test the first iPhone Release build took about four minutes on a Mac with an M4 Pro chip, and the first Android release build took about 14 minutes. Later builds are faster.
Both templates sign Android release builds with the debug keystore. That's why the release variant installs on an emulator without your upload key. It's fine for screenshots and wrong for Google Play, so keep your real signing setup for the build you upload.
If an AI builder made the app, download or clone the code first. Expo Go is handy for previewing, but it runs your project in development mode inside Expo's own app, so warnings and the developer menu can appear. Use a Release build for anything you upload. To build in the cloud instead, an EAS build profile with "ios": { "simulator": true } produces a simulator build you can install with eas build:run.
3. Load sample data and clean up the status bar
Empty lists and "Welcome, test@test.com" make a good app look unfinished. Put believable sample data behind a flag that only your screenshot build sets. Expo writes variables that start with EXPO_PUBLIC_ into the bundle at build time:
EXPO_PUBLIC_SCREENSHOTS=1 npx expo run:ios --configuration Release --no-bundler --device "$UDID"Then read it at startup, written out in full:
if (process.env.EXPO_PUBLIC_SCREENSHOTS === '1') {
  loadSampleData();
}
Expo only replaces process.env.EXPO_PUBLIC_* references written with dot notation. const { EXPO_PUBLIC_SCREENSHOTS } = process.env and process.env['EXPO_PUBLIC_SCREENSHOTS'] aren't inlined, which Expo's environment variables guide lists as unsupported, so the flag reads as undefined and the screenshots show your empty state.
Then set a 9:41 status bar with full signal and battery. On the iOS Simulator:
xcrun simctl status_bar "$UDID" override --time 9:41 --dataNetwork wifi --wifiBars 3 --cellularMode active --cellularBars 4 --batteryState charged --batteryLevel 100On an Android emulator, demo mode does the same:
adb shell settings put global sysui_demo_allowed 1
adb shell am broadcast -a com.android.systemui.demo -e command enter
adb shell am broadcast -a com.android.systemui.demo -e command clock -e hhmm 0941
adb shell am broadcast -a com.android.systemui.demo -e command battery -e level 100 -e plugged false
adb shell am broadcast -a com.android.systemui.demo -e command network -e wifi show -e level 4
adb shell am broadcast -a com.android.systemui.demo -e command notifications -e visible false
Leave demo mode with -e command exit and clear the iOS override with xcrun simctl status_bar "$UDID" clear. The 9:41 status bar guide covers devices and older Xcode versions.
4. Capture iPhone and iPad screenshots
Use an iPhone 18 Pro or 17 Pro simulator for the required 1206 × 2622 slot. The iPhone 18 Pro Max simulator, which we used here, captures at 1320 × 2868: that fills the optional large slot, and inside a frame on a designed page it works for either size. Simulators capture in pixels, not points: the Pro Max lays out at 440 × 956 points and draws each point at 3x, which gives 1320 × 2868. Add the iPad Pro 13-inch (M5) simulator, which captures at 2064 × 2752, if you need iPad. Keep the UDID in a variable so every command reaches the same device. The simulator recipes include a script that finds or creates the device and waits for it to finish booting.
Open screens with deep links rather than taps, so a rerun captures exactly the same screens. Expo Router turns every file in src/app/ (app/ in older projects) into a route. Groups such as (tabs) are left out of the URL, and a dynamic route like [id].tsx needs an id from your sample data. Replace myapp with the scheme in your app.json:
p=iphone   # p=ipad on the iPad simulator
for r in "" explore; do
  xcrun simctl openurl "$UDID" "myapp://$r"
  sleep 2
  xcrun simctl io "$UDID" screenshot --type=png "$p-${r:-home}.png"
done
xcrun simctl ui "$UDID" appearance dark
sleep 2
xcrun simctl io "$UDID" screenshot --type=png "$p-explore-dark.png"
sips -g pixelWidth -g pixelHeight -g hasAlpha "$p"-*.png
On iOS 27 simulators, simctl openurl with your app's scheme can stop at an "Open in" prompt, and every capture after it shows the prompt. npx expo run:ios approves only the bundle ID scheme it opens itself, so approve your app.json scheme once per simulator before the loop:
xcrun simctl spawn "$UDID" defaults write com.apple.launchservices.schemeapproval "com.apple.CoreSimulator.CoreSimulatorBridge-->myapp" -string com.example.myappApproving doesn't remove a prompt that's already on screen, so reboot the simulator if one is showing. In our test on the default template, a link to a screen outside the tab bar opened Home instead, so open tab screens by link and reach other screens from them.
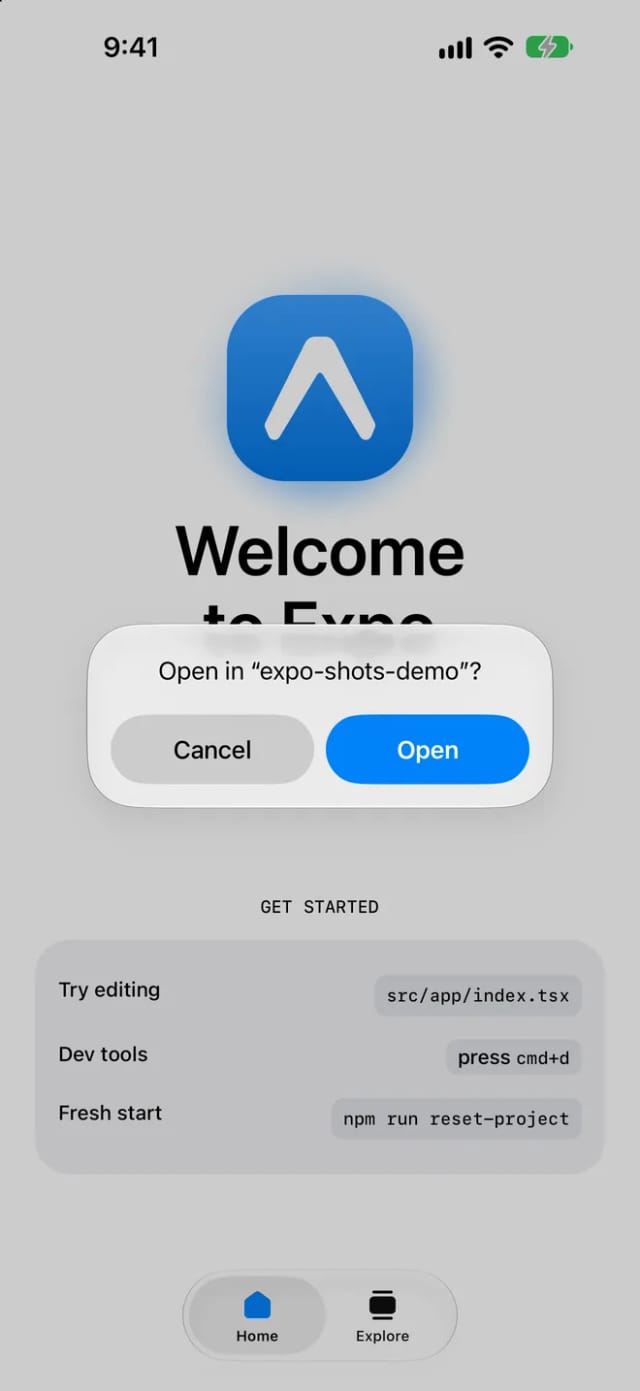
Dark mode only switches if userInterfaceStyle is "automatic", which is the template default. Our captures and their sizes:
iPhone 18 Pro Max simulator, iOS 27.2
iphone-home.png          pixelWidth: 1320  pixelHeight: 2868
iphone-explore.png       pixelWidth: 1320  pixelHeight: 2868
iphone-explore-dark.png  pixelWidth: 1320  pixelHeight: 2868

iPad Pro 13-inch (M5) simulator, iOS 27.2
ipad-home.png            pixelWidth: 2064  pixelHeight: 2752
ipad-explore.png         pixelWidth: 2064  pixelHeight: 2752
ipad-explore-dark.png    pixelWidth: 2064  pixelHeight: 2752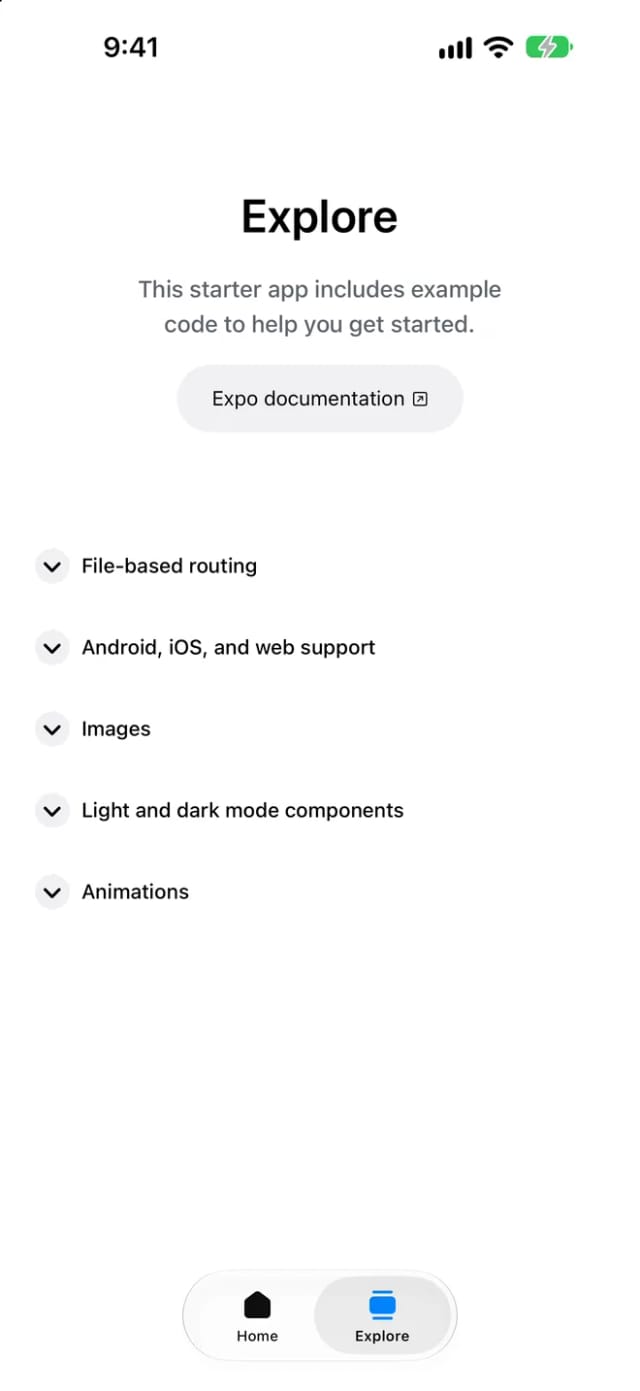
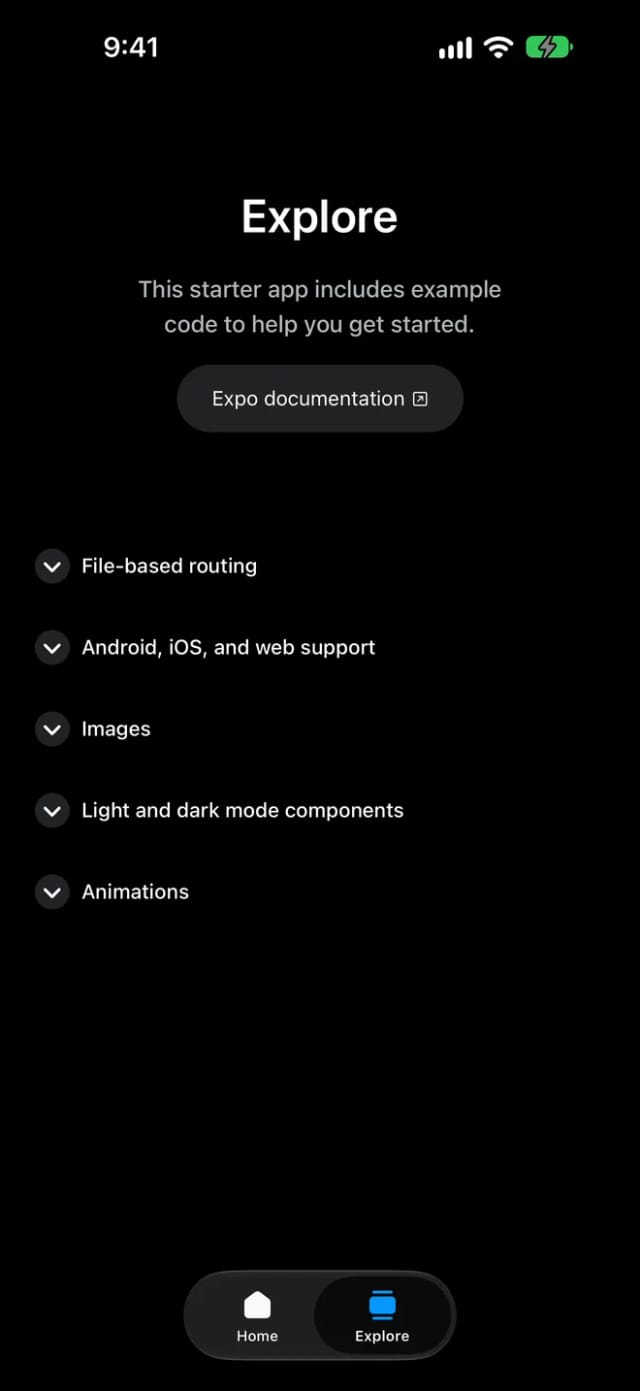
simctl ui appearance dark. To capture in another language, relaunch the app with launch arguments; the localized screenshots guide covers Android and right-to-left layouts too. Your app's text only changes if it is localized; dates and prices follow -AppleLocale:
xcrun simctl launch --terminate-running-process "$UDID" com.example.myapp -AppleLanguages "(de)" -AppleLocale de_DE The iPhone Duo simulator has two screens, so simctl io screenshot stops with "Cannot choose between 2 displays" until you name one. The error lists them; in our Xcode 27.2 run, display 1 was the outer screen at 1398 × 2034 and display 3 the inner screen at 2007 × 2853:
xcrun simctl io "$UDID" screenshot --type=png --display=1 duo-outer.png
xcrun simctl io "$UDID" screenshot --type=png --display=3 duo-inner.png
Our simulator booted folded, and the inner capture came out as a black 2007 × 2853 image. Open the device in Device Hub first, as the iPhone Duo guide shows. On the outer screen the starter app's clock and tab bar sat in a column at the right edge, so check each Duo capture before it goes into a design.
Don't scale a capture up from a smaller simulator to reach a store size: text and icons go soft, as the blurry screenshots guide explains. The template is portrait only. If your app supports landscape, rotate the simulator and capture the landscape sizes separately.
5. Capture Android screenshots that pass Google Play's 2:1 rule
With the release build running on the emulator and demo mode on, capture the home screen as it opens, then open other screens with an intent and give each one a moment to settle:
adb exec-out screencap -p > android-home.png
adb shell am start -a android.intent.action.VIEW -d "myapp://explore"
sleep 3
adb exec-out screencap -p > android-explore.png
adb shell cmd uimode night yes
sleep 3
adb exec-out screencap -p > android-explore-dark.png
sips -g pixelWidth -g pixelHeight -g hasAlpha android-*.png
Our Pixel 8 emulator (Android 15) captures:
android-home.png          pixelWidth: 1080  pixelHeight: 2400  hasAlpha: yes
android-explore.png       pixelWidth: 1080  pixelHeight: 2400  hasAlpha: yes
android-explore-dark.png  pixelWidth: 1080  pixelHeight: 2400  hasAlpha: yes
Look at the top of the light-mode captures before you go on. In ours the status bar was empty: the SDK 58 template doesn't render a StatusBar component and its Android theme doesn't ask for dark icons, so the clock and icons came out white on a white screen. Dark mode looked fine. expo-status-bar is already in the template's dependencies, so add it to the root layout and rebuild:
// src/app/_layout.tsx
import { StatusBar } from 'expo-status-bar';

// in the returned JSX, next to your navigator:
<StatusBar style="auto" />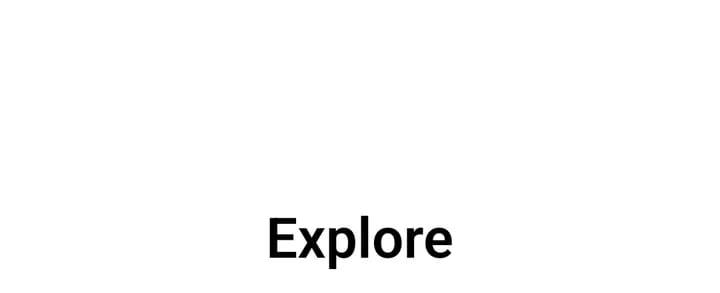
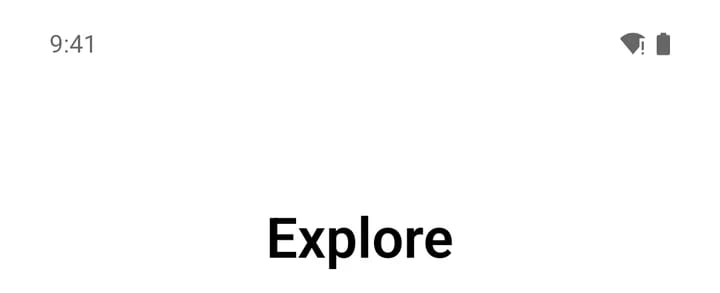
<StatusBar style="auto" />: dark icons in light mode.Google Play rejects a screenshot whose long side is more than twice its short side. A 1080 × 2400 capture is 2.22 to 1, so it fails even though both sides are within range. There are three ways to get an image Google Play accepts:
- Capture at 9:16. Change the emulator's screen size, capture, then put it back. The app lays itself out for the new size, so check that nothing is cut off.
adb shell wm size 1080x1920
adb exec-out screencap -p > android-explore-916.png
adb shell wm size reset
Don't skip the reset. The override survives a reboot: our emulator still reported
Override size: 1080x1920from an earlier run that stopped before resetting it. - Fit the capture into a 9:16 canvas. On a Mac, scale it to 1920 px tall and pad the sides:
sips --resampleHeight 1920 android-explore.png --out android-explore-1920.png sips --padToHeightWidth 1920 1080 --padColor FFFFFF android-explore-1920.png --out android-explore-916.png - Frame it on a designed page. If you are adding captions anyway, skip the resize. A raw capture inside a phone frame on a 9:16 page passes the 2:1 rule untouched, as the AppScreens preview in step 6 shows with these 1080 × 2400 captures.
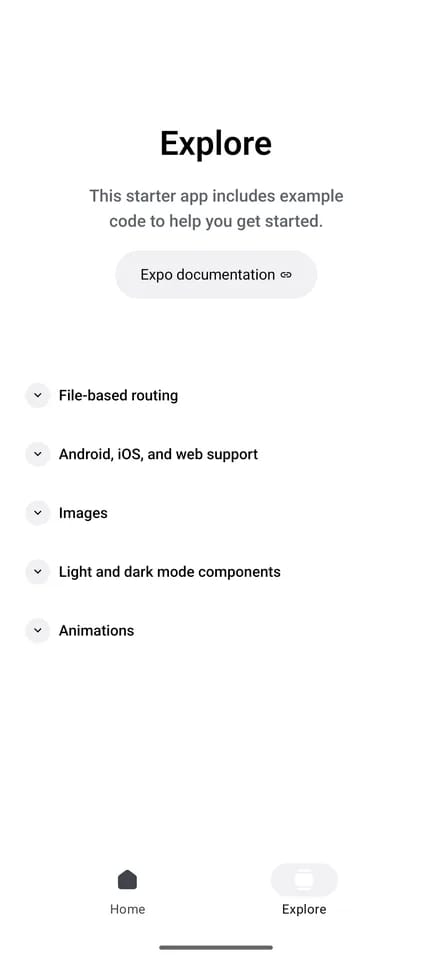
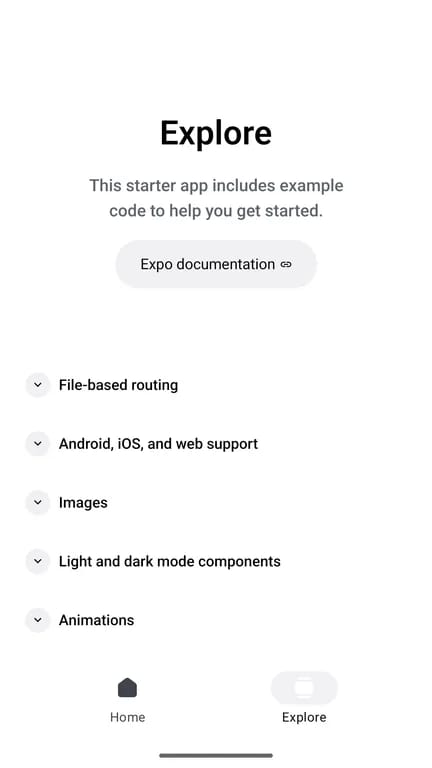
wm size 1080x1920: the app lays itself out again.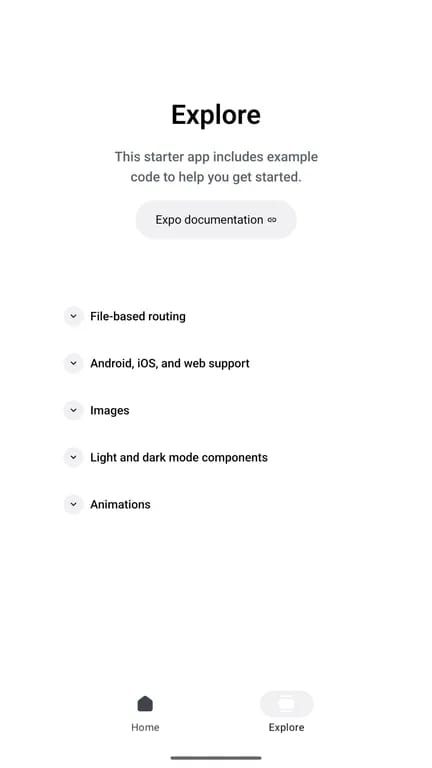
Google asks for 24-bit PNG or JPEG with no alpha channel. If hasAlpha says yes, export the final image without it; the feature graphic guide shows how. The Google Play sizes page lists the rules for tablets, Wear OS and the rest.
Automate it with Maestro
For a set you'll recapture every release, a Maestro flow opens each screen and saves a full-screen PNG, on the iOS Simulator and the Android emulator alike. Run it with maestro test screenshots.yaml after the status bar overrides above:
# screenshots.yaml
appId: com.example.myapp
---
- launchApp
- takeScreenshot: 01-home
- openLink: myapp://explore
- takeScreenshot: 02-explore
Maestro writes the images into the flow's artifact folder. react-native-view-shot, which Expo documents as captureRef, is a different tool: it captures one view from inside the app, with no status bar, which suits share images more than store screenshots.
No Mac? Take them on a phone
Many apps built in Replit or Bolt never touch a Mac. Install the TestFlight build on an iPhone 17 Pro or 18 Pro and take the screenshots on the phone: they come out at the required 1206 × 2622. A Pro Max gives 1320 × 2868, for the optional large slot or a framed design. You can't override the status bar, so turn on Wi-Fi, charge to 100% and use a Focus mode to hide notifications. On Android, a phone screenshot needs the same 9:16 fitting as an emulator capture. The AI-built app checklist covers the rest of the submission for Replit and Bolt apps.
6. Turn the captures into store screenshots
Plain captures and designed screenshots can both be submitted if they meet the current requirements and show the app accurately; the store decides approval. Treat captures as source material: the captions, order and design around them affect how many visitors install. In tests published in 2017, AppAgent found that only 9% of people scrolled through portrait screenshots, so the first two images and their captions have to carry the pitch. Order and design move installs too: in Sensor Tower's test for Skoda Little Driver, reordering the screenshots lifted installs by 6.4% against the control, and customized backgrounds lifted them by 4.4%. Those are one app's numbers, so test your own order and captions once the listing has traffic; the screenshot test results in our ASO guide cover more cases.
The first images are also what search shows: with no app preview, Apple puts the first one to three screenshots in search results. Lead with the app in use, because guideline 2.3.3 asks for screenshots that show the app in use, "not merely the title art, login page, or splash screen". Captions and frames on top are fine.
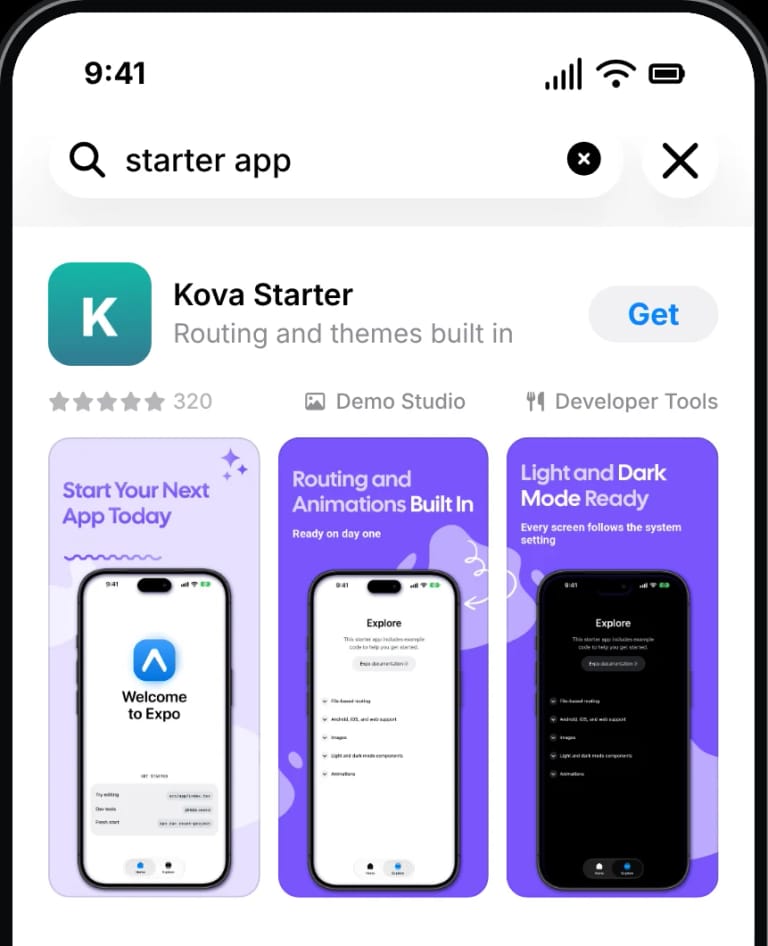
For consumer-style sets made the same way, see Simmer in the Capacitor guide and Steady in the Flutter guide.
With your coding agent: add the AppScreens MCP server to Claude Code or Codex. Cursor and other clients are on the connect page.
claude mcp add --transport http --scope user appscreens https://api.appscreens.com/mcp
codex mcp add appscreens --url https://api.appscreens.com/mcp
In Claude Code, run /mcp, select appscreens and choose Authenticate. In Codex, run codex mcp login appscreens if sign-in doesn't start. Then ask from your project folder:
Help me make App Store and Google Play screenshots for this Expo app with AppScreens. Ask me what you need. The agent reads app.json for the name and supportsTablet, asks which stores and languages you want, and picks the outputs from that. It applies a template (Kova in the preview below), uploads your captures, writes captions and shows you a preview. The project stays editable in the AppScreens editor in your browser, so you can change any caption or color by hand. The free plan covers one project of up to five screenshots, which you export from the editor. On a paid plan the agent also exports every size, and it uploads to App Store Connect and the Google Play main listing only after you approve the upload preview. The Claude Code walkthrough shows a full session, and the screenshot prompts guide has one-line prompts for edits, translations and test variants.
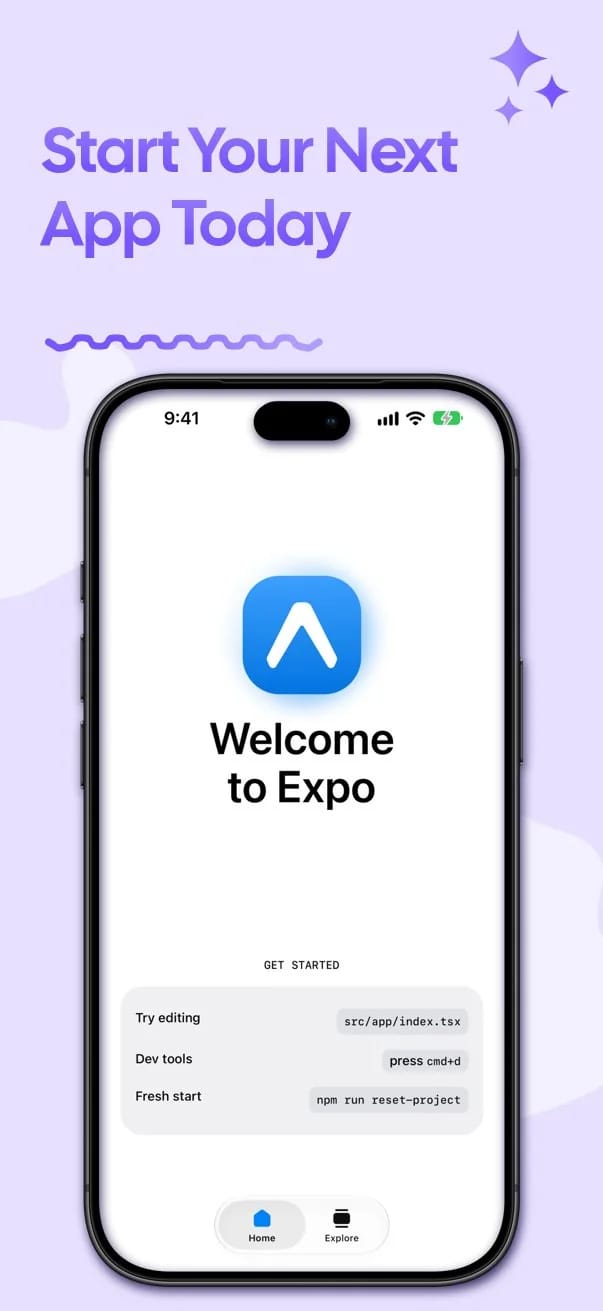
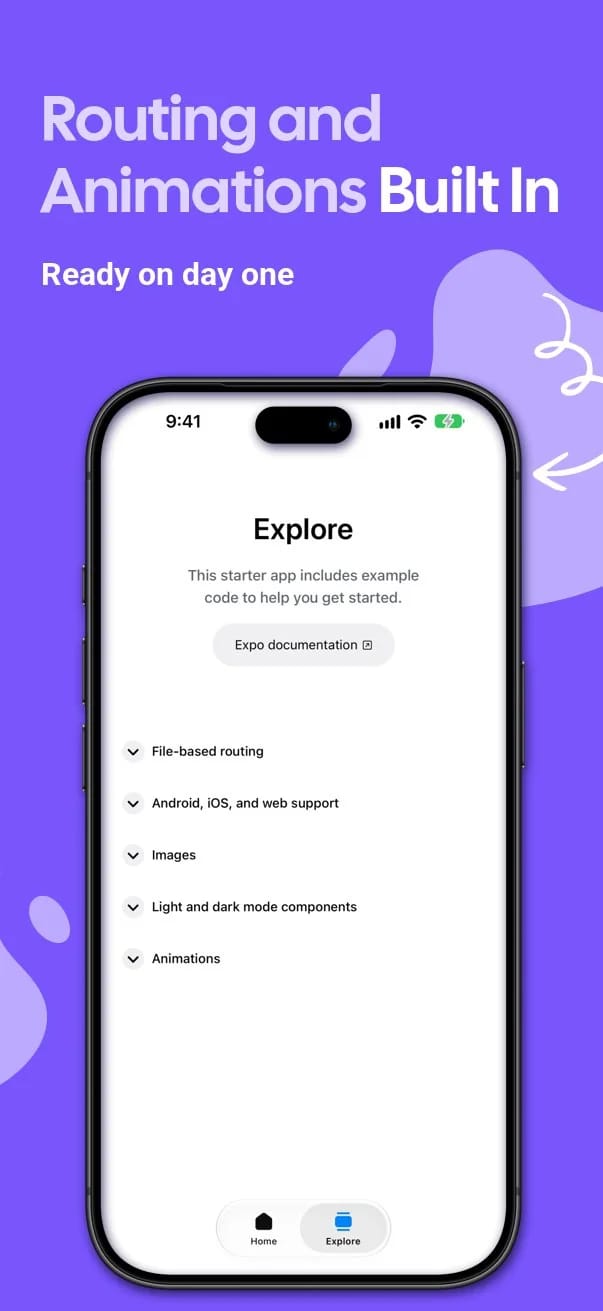
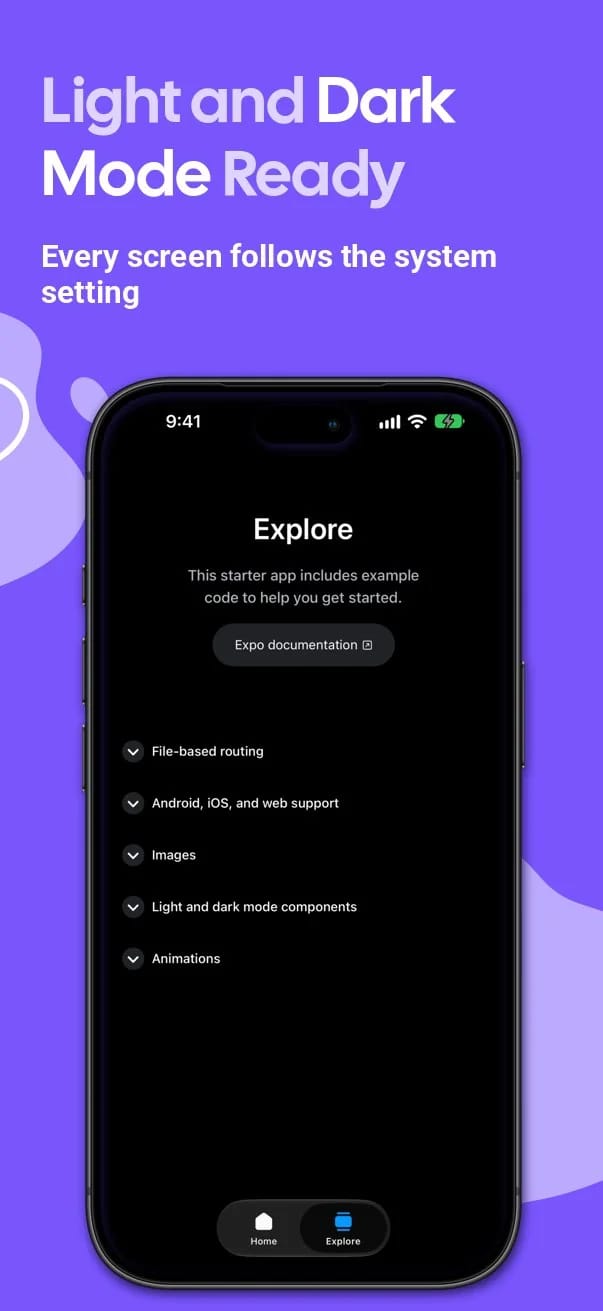
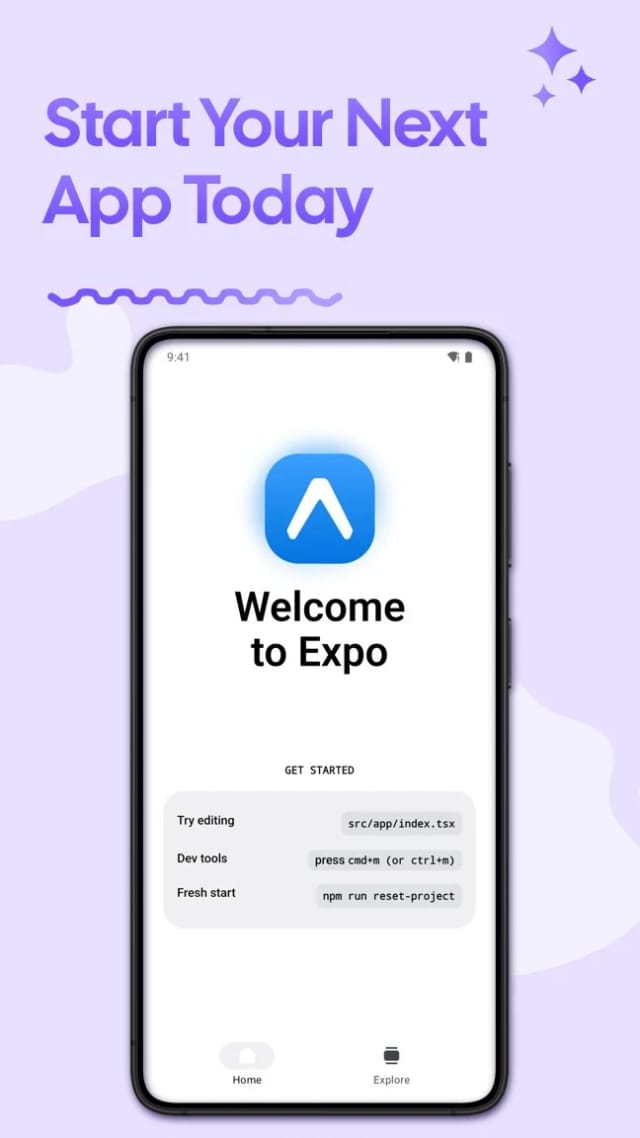
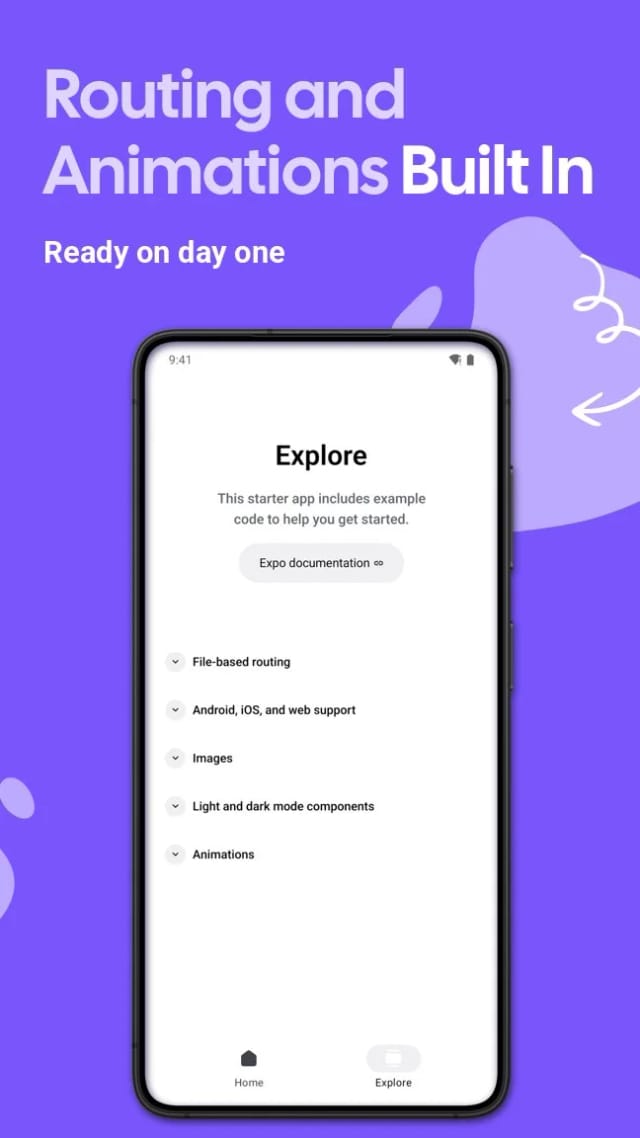
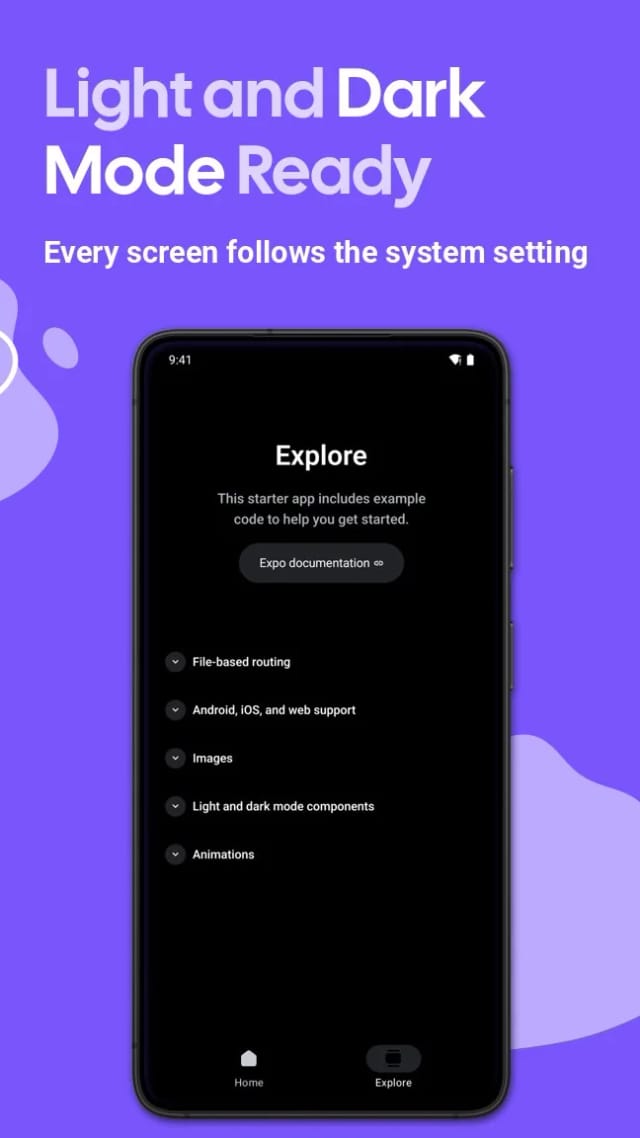
The agent's preview from the captures in this guide: iPhone at 1206 × 2622 on top, Google Play at 2160 × 3840 below. The 20:9 Android captures sit inside a phone frame on the 9:16 page, so they need no resizing. The same project also renders the iPad size.
In the browser: no coding agent? Start from a template in AppScreens, upload the same captures, edit the captions and export. The agent works in the same editor, so you can switch between the two at any time, and the free plan needs no card.
By hand: in Figma or any design tool, make a 1206 × 2622 frame for iPhone and a 1080 × 1920 frame for Google Play. Put a short caption at the top, scale each capture down to fit below it (never up) and export PNG at 1x. Repeat for iPad if the app supports it, and for each language: five screens across iPhone, iPad and Google Play is 15 frames per language, before iPhone Duo adds its own sizes.
7. Does eas submit upload screenshots?
No. Expo's tools ship the build and some of the listing text, not the images, so plan the screenshot upload as its own step:
The build
eas build
A signed IPA for iOS or AAB for Android
eas submit
Uploads the binary
The build in App Store Connect or a Play Console track
TestFlight on iOS
Carries no screenshots
The listing
Captures
Simulator, emulator or phone
Screenshots for each store size
By hand, or with AppScreens
Upload to the version page or main store listing
By hand, with fastlane deliver and supply, or with AppScreens on a paid plan
Listing text: by hand, or EAS Metadata for the App Store
eas submit carries the binary. Screenshots and listing text reach the store by a separate route.A first App Store submission goes in this order:
- Create the app in App Store Connect with its name, primary language, bundle ID and SKU.
- Build with
eas build --platform ios. - Upload the build with
eas submit --platform ios. It appears in TestFlight after processing. - On the version page, add the description, keywords, support URL and App Privacy details, and select the build.
- Upload the screenshots for each device size, by hand or with one of the tools below.
- Choose Add for Review, then Submit for Review.
Publishing costs $99 a year for the Apple Developer Program and a one-time $25 for a Google Play developer account. The submission guide covers review times and what App Review checks.
| Tool | What it uploads | Screenshots? |
|---|---|---|
eas submit | The binary, to App Store Connect or Google Play | No |
npx testflight | Builds, then submits to TestFlight internal testing | No |
| Expo Metadata (EAS Metadata) | App Store listing details from store.config.json, such as name, subtitle, description, keywords, release notes and review details. In beta, App Store only. | No. Expo's docs mark screenshot upload as not covered. |
| App Store Connect and Play Console | Drag the files into each device section of the version or store listing | Yes, by hand |
fastlane deliver and supply | Metadata and images from folders | Yes, once configured |
| AppScreens | The exported set in every language you choose, after you approve the upload preview | Yes, App Store Connect and the Google Play main listing, on paid plans |
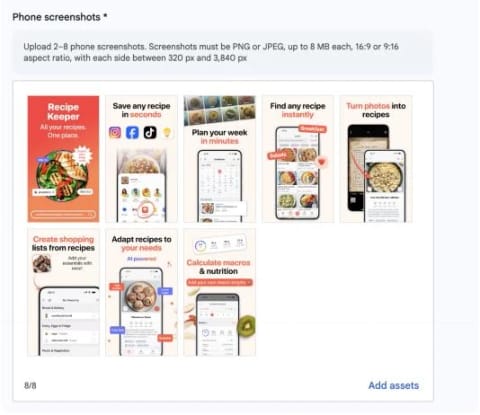
In App Store Connect, screenshots belong to an app version. Once a version is approved, changing them means a new version, or a product page test treatment that you apply. Google Play handles store listing changes separately from app releases in its publishing overview. The release checklist covers the rest of an App Store submission.
Common mistakes
| Mistake | What happens | Fix |
|---|---|---|
| Capturing in Expo Go or a Debug build | Warnings and developer UI end up in the screenshot | Build the Release configuration |
| Leaving the React Native template's iPad support on | App Store Connect asks for iPad screenshots of a layout nobody designed | Remove iPad under Supported Destinations before the first release |
Changing supportsTablet with a committed ios folder | Nothing changes in the build | Run npx expo prebuild -p ios --clean |
| Uploading a raw Android capture | Play Console rejects it for being taller than 2:1 | Capture at 1080 × 1920 or fit it into 9:16 |
| Scaling up a capture from a small simulator | Soft text in the listing | Capture at store size: an iPhone 18 Pro or 17 Pro simulator, and the 13-inch iPad simulator |
| Leading with the splash or sign-in screen | Guideline 2.3.3 asks for the app in use, and the first one to three show in search when there's no app preview | Lead with the screen that shows the main benefit |
| Capturing before fonts and images load | Fallback fonts, blank image slots or spinners in the set | Wait a few seconds after each deep link, or wait for an element in a Maestro flow |
| Content under the Dynamic Island | Headers clipped at the top of the iPhone capture | Use safe-area insets, for example with react-native-safe-area-context |
| Reusing Android captures in the App Store set | An Android status bar and navigation bar on iPhone pages, which guideline 2.3.10 bars | Capture each platform on its own simulator or emulator |
Expecting eas submit to carry the listing | The build arrives with no screenshots | Upload the images as a separate step |
| Uploading plain captures as the final set | Most visitors judge the app from the first images without scrolling | Add a benefit caption to each screen and lead with the strongest one |
Finish the set from your project folder
Your captures are the source material. Connect AppScreens and the coding agent in your project folder turns them into a captioned set for iPhone, iPad and Google Play that you can keep editing in the browser. Start free with one project of up to five screenshots. Paid plans let the agent export every size, translate the captions and upload to App Store Connect and the Google Play main listing after you approve the upload preview.
FAQ
What size should screenshots for an Expo app be?
Use 1206 x 2622 or 1179 x 2556 portrait for iPhone, the required iPhone with Dynamic Island (medium display) slot; 1320 x 2868 from the Pro Max simulator fills the optional large slot. Add 2064 x 2752 for the 13-inch iPad set when the app supports iPad, a 9:16 image such as 1080 x 1920 for Google Play phones, the 1024 x 500 feature graphic and a 512 x 512 Play icon. No file may have an alpha channel.
Do Expo apps need iPad screenshots?
Only if the app runs on iPad. ios.supportsTablet defaults to false and the default Expo template does not set it, but the blank and tabs templates set it to true, so check your app.json. A new React Native CLI app sets TARGETED_DEVICE_FAMILY to "1,2", so App Store Connect asks for 13-inch iPad screenshots unless you remove iPad before the first release.
How do I capture Expo screenshots on iOS and Android?
Build a Release version with npx expo run:ios --configuration Release --no-bundler --device UDID, set the status bar with xcrun simctl status_bar UDID override --time 9:41, and capture each screen with xcrun simctl io UDID screenshot home.png, opening screens with deep links. On Android, run npx expo run:android --variant release --no-bundler, turn on demo mode, capture with adb exec-out screencap -p and fit the image into 9:16. Avoid Expo Go, which runs your project in development mode inside Expo's own app, so warnings and the developer menu can appear.
How do I submit an Expo app to the App Store?
Create the app in App Store Connect, build with eas build and upload the build with eas submit. Then add screenshots, a description, keywords, a support URL and App Privacy details on the version page, select the build, and choose Add for Review and Submit for Review.
How much does it cost to publish an Expo app?
The Apple Developer Program costs $99 a year, and a Google Play developer account has a one-time $25 registration fee. Expo's EAS services have their own free and paid plans; you can also build locally.
Does eas submit upload App Store screenshots?
No. eas submit uploads the build. EAS Metadata, which is in beta and supports the App Store only, uploads listing text from store.config.json, and Expo's docs mark screenshot upload as not covered. Upload the images in App Store Connect, with fastlane deliver, or, on a paid plan, with AppScreens after you approve the upload preview.
Do App Store screenshots need a device frame?
No. You can submit plain captures at the right size if they show the app accurately; the store decides approval. Apple guideline 2.3.3 asks for screenshots that show the app in use and allows text and image overlays, so captions and frames are optional. They are worth adding because the first one to three images show in App Store search results, and the caption is what tells a visitor why to install.
Can I use the same screenshots for iOS and Android?
Reuse the captions and design, not the files. Apple wants exact sizes such as 1206 x 2622, Google Play caps the long side at twice the short side, and guideline 2.3.10 bars other platforms' imagery in App Store metadata. Capture each platform on its own simulator or emulator so the interface matches the store. One AppScreens project can hold both stores, with iPhone captures on the App Store pages and Android captures on the Google Play pages, so a caption change updates every size.
Can react-native-view-shot or Maestro take store screenshots?
Maestro can: its takeScreenshot command saves the whole screen while a flow opens each screen, on the iOS Simulator and Android emulator. react-native-view-shot, documented by Expo as captureRef, captures a single view from inside the app with no status bar, so it suits share images more than store screenshots.
Why does Google Play reject my Android screenshot?
Google Play rejects a screenshot whose long side is more than twice its short side. A 1080 x 2400 emulator capture is 2.22 to 1, so it fails even though both sides are within the 320 to 3840 pixel range. Place the capture in a 9:16 canvas such as 1080 x 1920 without stretching it, or frame it on a designed 9:16 page.
How do I turn off iPad support in an Expo app?
Remove ios.supportsTablet from app.json or set it to false, and make sure ios.isTabletOnly is not set. If your project has a committed ios folder, run npx expo prebuild -p ios --clean so the Xcode project picks up the change. Do it before the first release, because App Store Connect refuses an update that drops a device family the previous version supported.
Can I take iOS App Store screenshots without a Mac?
Yes. Install the TestFlight build on a current Pro Max iPhone and take the screenshots on the phone, which gives the same 1320 x 2868 size as the simulator. You cannot override the status bar, so use Wi-Fi, a full battery and a Focus mode to hide notifications.
Can my coding agent make the App Store screenshots for my Expo app?
Yes. Connect the AppScreens MCP server at https://api.appscreens.com/mcp to Claude Code, Codex or Cursor and ask from your project folder. The agent reads app.json for the name and iPad support, asks which stores and languages you want, uploads your captures, writes captions and shows a preview at every size. The free plan covers one project of up to five screenshots, exported from the browser editor. On a paid plan the agent also exports every size, and uploads to App Store Connect and the Google Play main listing after you approve the upload preview.
Sources
- Expo: app.json reference (
ios.supportsTablet,isTabletOnly,userInterfaceStyle) - Expo CLI (Release builds with
run:iosandrun:android) - Expo: Environment variables
- Expo Metadata, Submit to the Apple App Store and npx testflight
- React Native CLI: run-ios options (
--mode,--udid) - Replit: upload a mobile app to the App Store and Bolt: Expo integration
- Apple QA1623: device support errors when uploading an update
- Apple: Screenshot specifications and iPhone Duo announcement
- Google Play: Add preview assets to showcase your app and Control when app changes are reviewed and published
- AppAgent on ASO Stack: screenshot scroll study (9% scrolled through portrait screenshots)
- Sensor Tower: Skoda Little Driver A/B test (+6.4% installs from reordering, +4.4% from customized backgrounds)
- Apple: App Review Guidelines (2.3.3, 2.3.10) and Creating your product page
- Maestro takeScreenshot, Expo captureRef and EAS simulator builds
Tested with Expo SDK 58 (expo 58.0.24) and React Native 0.88.1 on macOS 26.7.2 with Xcode 27.2, on a Mac with an M4 Pro chip. Template settings checked in expo-template-default 58.0.33, @expo/config-plugins 58.0.13 and @react-native-community/template 0.88.1.
Quote sections, tables and commands from this guide in your own posts, documentation or answers with a link to this page. Please do not republish the whole guide.
AppScreens.com, "App Store Screenshots for Expo and React Native Apps", 4 November 2026. https://appscreens.com/blog/expo-react-native-app-store-screenshots